Shopify and Card Club, working as one stock.
Connect your store in about ten minutes with a picture for every click, pull your products in, send Card Club stock back, and set up the collections and filters that make card stock browsable in Shopify. All on this page.
Make a small private app, paste two keys, done. Sales and stock sync both ways from then on.
I list from Card Club into ShopifyMake it filterable in ShopifyThe Lister's file carries game, set, language, condition and grade. Turn those into collections and filter sidebars.
Open My store → Vendor view → Connect Shopify, type your store address and hit Connect. If Shopify asks you to approve Card Club, approve it and you're done, skip this page. If Shopify shows "This installation link can't be used", come back here and follow Part A.
Part A · Shopify Dev DashboardMake a small app for your store
Shopify calls them apps, but this one has no screens. It's just a key that lets Card Club read your products and stock and log sales. Only your store can use it.
Open the Dev Dashboard
Go to dev.shopify.com/dashboard and sign in with the same login you use for your Shopify admin. Click Apps in the left menu, then Create app top right.
If you've never been here, Shopify may ask you to create an organisation first. Accept the defaults, it takes a few seconds.
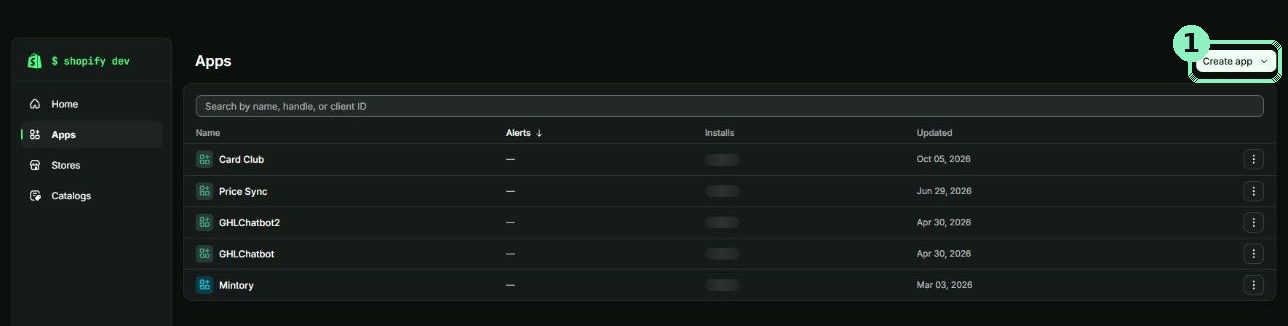
Choose "Create app manually"
A small menu drops down. Ignore the command-line option at the top and click Create app manually.
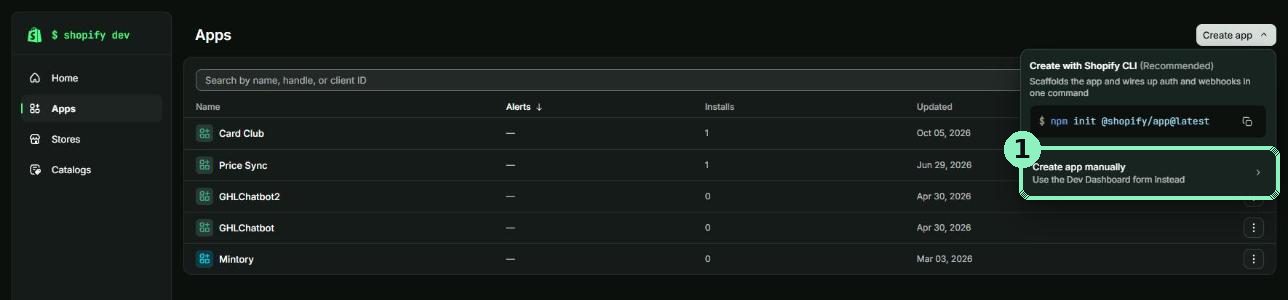
Fill in the form exactly like this
- 1App name: Card Club
- 2App URL:
https://www.cardclub.com.au/ - 3Untick "Embed app in Shopify admin"
- 4Scopes: paste the eight below. Leave redirect URLs empty and "legacy install flow" unticked.
- 5Click Create app
read_products, write_products, read_orders, read_inventory, write_inventory, read_locations, read_publications, write_publicationsThe scopes are what Card Club is allowed to touch: your products and stock, your orders (so a sale marks the card sold), and your location (so stock goes to the right place). The last two let Card Club put new products on your Online Store and POS channels, otherwise they land in Shopify hidden from every channel. Nothing about customers or payments.
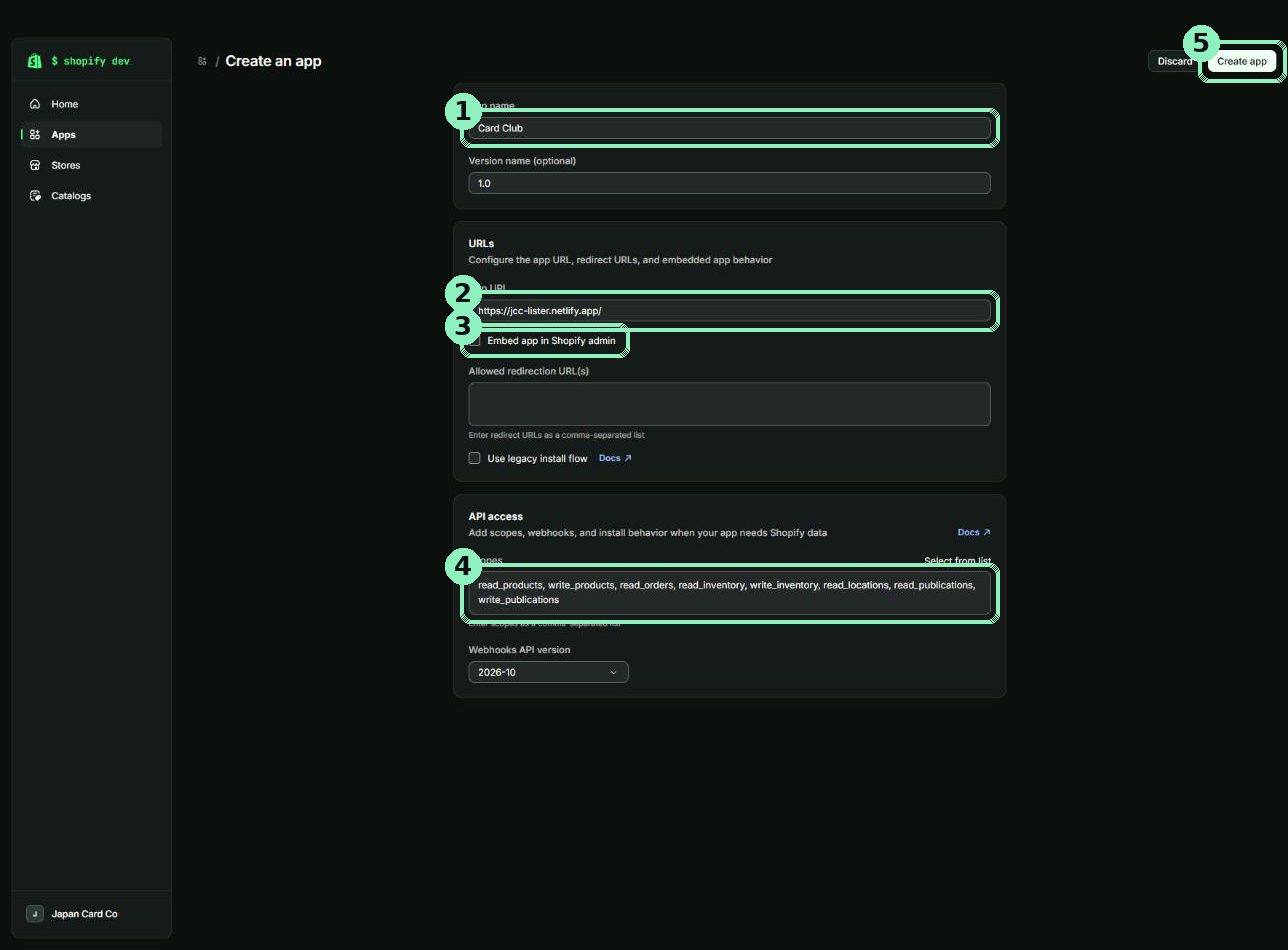
Install it on your store
You land on the app's Overview. Click Install app at the top of the Installs card.
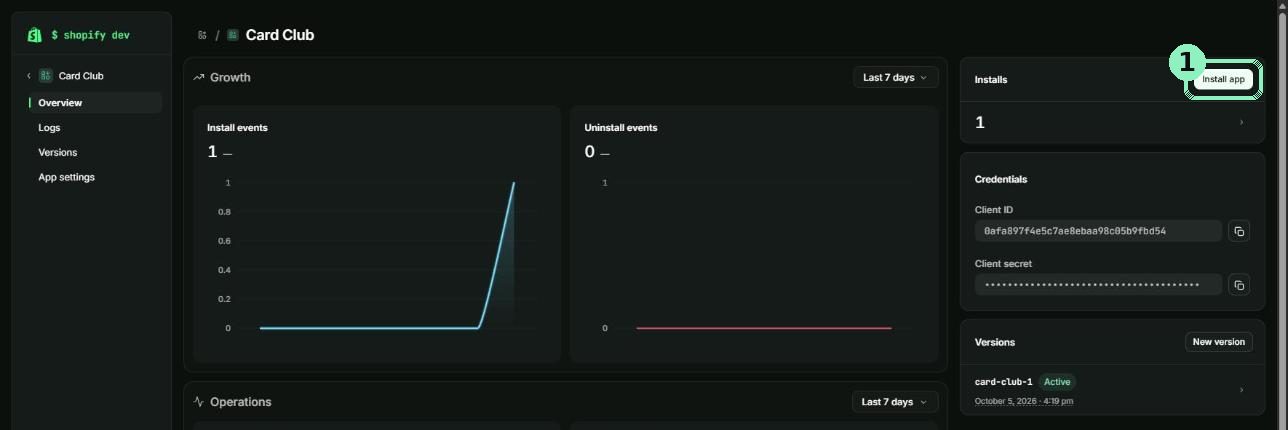
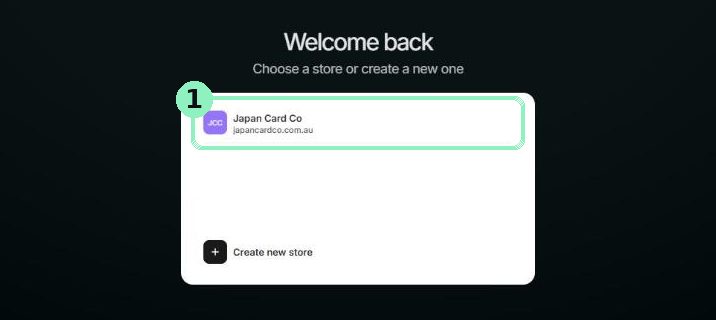
Pick your store and approve
Shopify opens a store picker. Click your store, then Install on the approval screen that follows. Installs should now say 1 back on the Overview.
Copy the two keys
Click App settings in the left menu. Under Credentials copy the Client ID (1) and reveal and copy the Client secret (2). Paste them somewhere safe for a minute, a note on your phone is fine. You're about to put them into Card Club.

Part B · Shopify adminFind your store's address
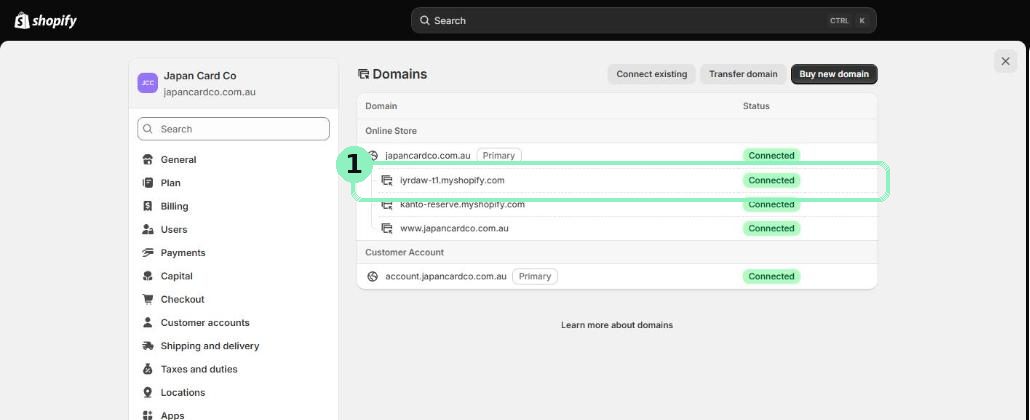
Card Club needs your store's .myshopify.com address, not your website domain. Shopify gives every store a random one, and the custom domain hides it.
Settings → Domains
In your normal Shopify admin go to Settings → Domains. The line ending in .myshopify.com is the one. Write down just the first part, for example tcfv1y-nr.
Quicker: when you're logged into admin, the browser address bar reads admin.shopify.com/store/something. That something is it.
Part C · Card ClubConnect
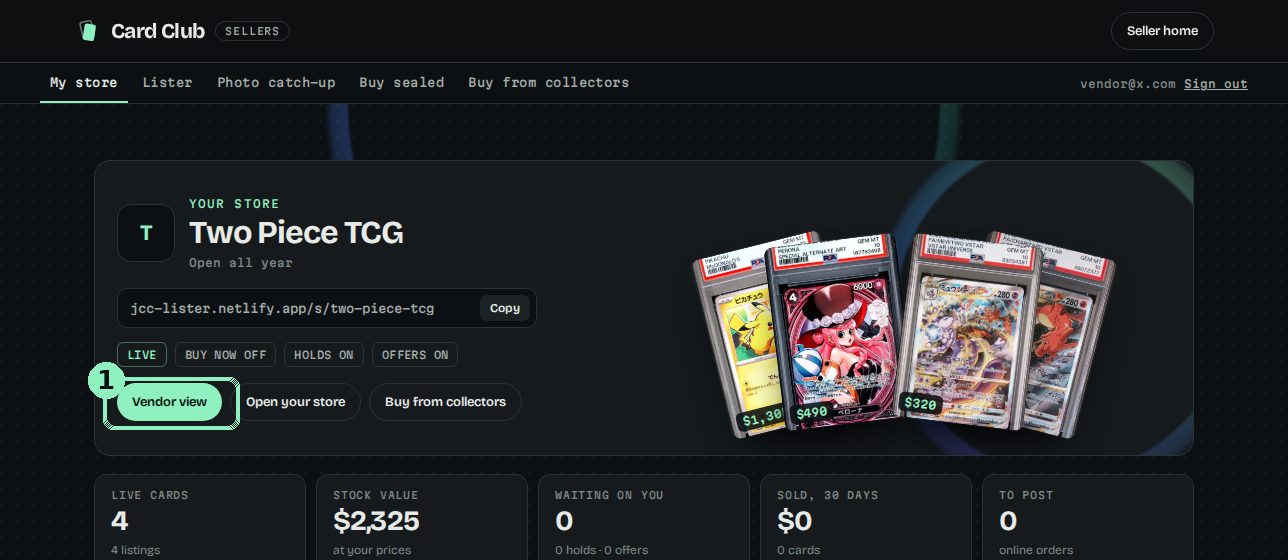
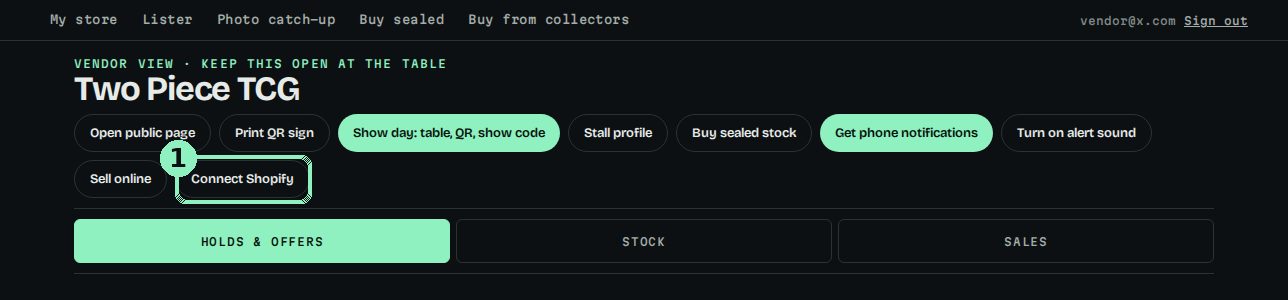
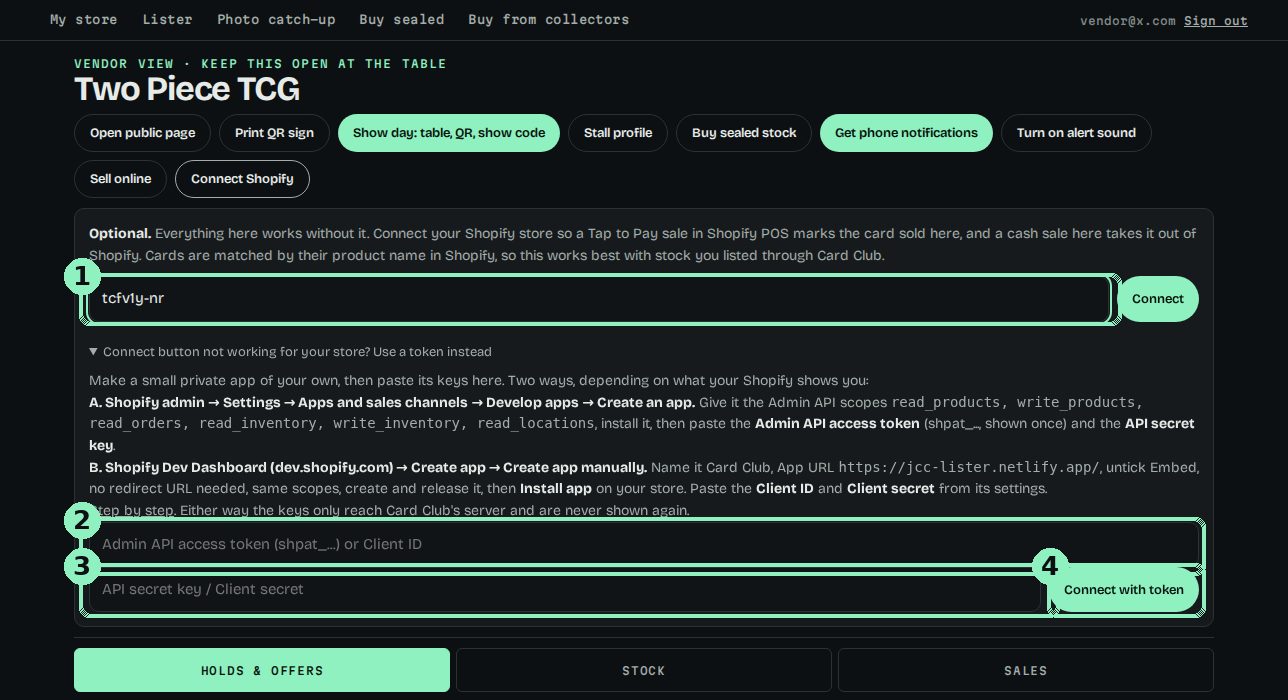
Click Connect Shopify
It's in the row of buttons under your store name. On a phone the buttons wrap, it's near the end.
Paste the address and the two keys
- 1Store address: the short name from Part B, like
tcfv1y-nr. Card Club adds the .myshopify.com. - 2Open "Use a token instead" and paste the Client ID in the first box
- 3Paste the Client secret in the second box
- 4Click Connect with token
Card Club checks the keys with Shopify, then tells you how many of your Card Club cards it found in your store. The button changes to Shopify: Your Store Name.
Part D · Card ClubPull your stock in, send stock back
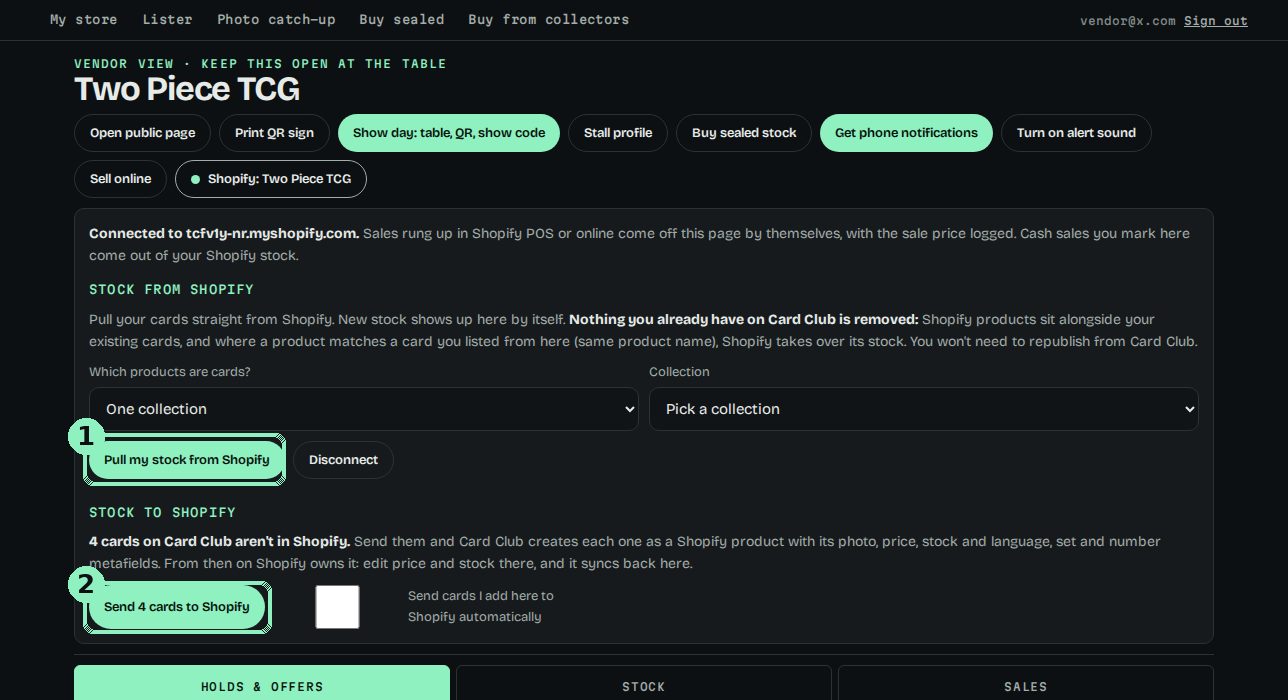
Connected means sales already sync both ways: a sale on Card Club takes the unit out of Shopify, a POS or online sale drops it off Card Club. Two optional buttons do the rest.
Pull, and send
- 1Pull my stock from Shopify. Pick which products are cards (one collection, a tag, or everything) and pull. Nothing already on Card Club is removed: Shopify products sit alongside your existing cards, and where one matches a card you listed from Card Club, Shopify takes over its stock. New products in Shopify show up here by themselves.
- 2Send cards to Shopify. Anything on Card Club that isn't in Shopify yet becomes a Shopify product with its photo, price, stock and the language, set, number, rarity and condition metafields. Tick the box underneath and cards you quick-add at the table go to Shopify too.
After a pull or a send, Shopify owns that product: change price or stock there and Card Club follows within the hour.
Already made the app?Add the two newer scopes
If you set the app up before the read_publications and write_publications scopes were on the list, cards you send to Shopify arrive as active but on no sales channel, so they don't show in your online store or POS. Two minutes to fix, and it's automatic from then on.
Versions → Create version
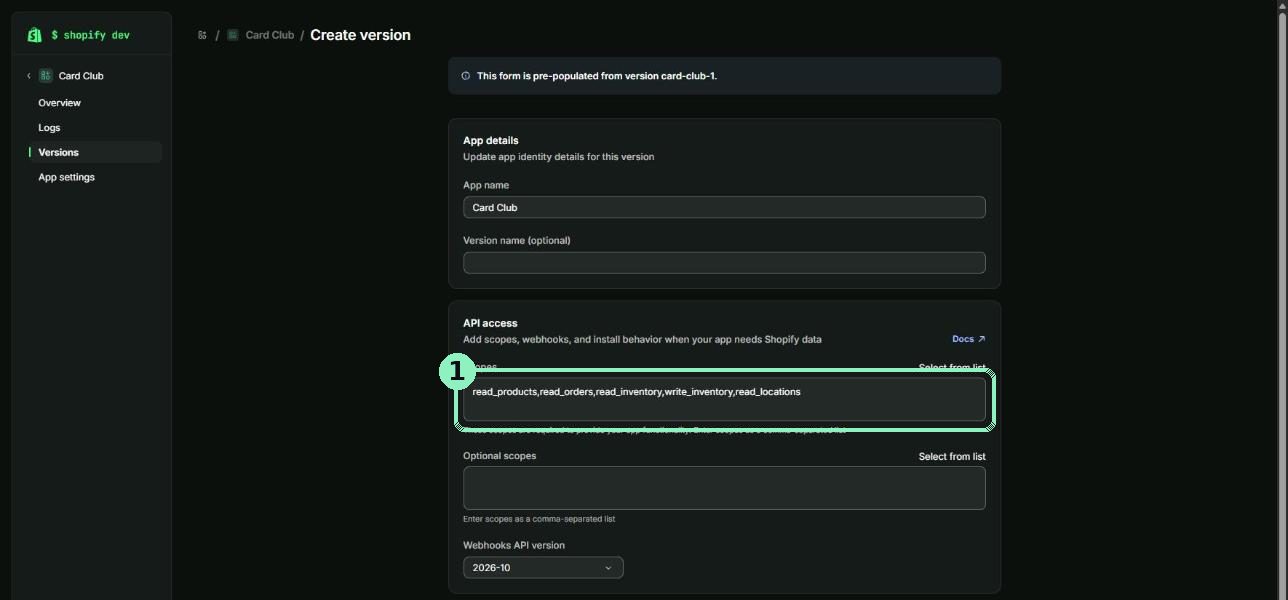
In the Dev Dashboard open your Card Club app, click Versions in the left menu, then Create version top right. The form comes pre-filled from your current version.

Add the scopes and release
In the Scopes box add write_products, read_publications, write_publications to whatever is already there (they're comma separated). Scroll down and click Release.
Then in Card Club: Vendor view → Shopify → Disconnect, then connect again with the same Client ID and secret. That makes Shopify issue a token with the new permissions straight away instead of waiting for the old one to expire.
For products you already sent: Shopify admin → Products → filter Sales channel: none → select all → More actions → Make available on channels → tick Online Store and POS.
Part E · Inside ShopifyMake card stock filterable in Shopify
Whether products arrived by Card Club's Send button or the Lister's CSV, they carry tags and metafields for game, set, language, rarity, printing, condition and grade. Five steps turn those into collections and a filter sidebar.
E2Automated collections, one rule each
In Shopify admin go to Products → Collections → Create collection, pick Automated, and set one condition. New imports fall into them automatically, nothing to maintain.
| Collection | Condition |
|---|---|
| Japanese | Product tag · is equal to · Japanese |
| English | Product tag · is equal to · English |
| One Piece | Product tag · is equal to · One Piece Card Game |
| Pokémon | Product tag · is equal to · Pokémon (match whatever your Collectr category says) |
| Graded | Product type · is equal to · Graded Card |
| PSA 10 | Product tag · is equal to · PSA 10 |
| A single set | Product tag · is equal to · the set name as it appears in the file, e.g. Paldean Fates |
Japanese and tag One Piece Card Game for a "Japanese One Piece" collection.E3Create the filter definitions (once)
Shopify builds a clean one-per-facet filter from metafields. Create these definitions once and the Lister fills them on every import when you tick Add filter columns in the settings.
Go to Settings → Custom data → Products → Add definition. For each row: type the name, make sure the namespace and key reads exactly as shown, choose Single line text, and under Storefront access (or "Filtering", depending on your admin) turn on access so the filter app can see it.
| Name | Namespace and key | Type | Example value |
|---|---|---|---|
| Language | custom.language | Single line text | Japanese |
| Game | custom.game | Single line text | One Piece Card Game |
| Set | custom.set | Single line text | Awakening of the New Era |
| Card number | custom.card_number | Single line text | OP05-119 |
| Rarity | custom.rarity | Single line text | Secret Rare |
| Printing | custom.printing | Single line text | Alternate Art |
| Condition | custom.condition | Single line text | Near Mint |
| Grade | custom.grade | Single line text | PSA 10 |
E4Turn the filters on
- Install Shopify's free Search & Discovery app from the App Store if it isn't already there (Online Store → Preferences links to it, or search the App Store).
- Open the app → Filters → Add filter.
- Add Language, Set, Condition, Grade and Game from your product metafields. Add Price and Availability while you're there. Drag them into the order you want.
- Check your theme shows filters on collection pages: Online Store → Customize → Collection page → Product grid → Enable filtering (Dawn and most free themes have this toggle).
Skip the plain "Tags" filter in that app. It works, but it dumps every tag into one list and your buyers will have to scroll past Lightly Played to find Japanese.
E5Import the file
- In the Lister, tick Add filter columns under the settings, match your export and Download Shopify CSV.
- Shopify admin → Products → Import, choose the file, and tick Overwrite products with matching handles so weekly updates replace rather than duplicate.
- Shopify emails when it's done. Cards with no picture arrive as drafts if you left that setting on, so they don't show as blank tiles.
Questions
I don't have Shopify. Do I need it? No. Card Club is a full store on its own: stock page, checkout, holds, offers, tracking. This page is only for vendors who already run one. See the two ways in.
My theme has no filter sidebar. Search & Discovery still works on the search page, and collections from E2 give buyers a way in regardless. Most paid themes have a filter toggle under the collection page settings.
Can I rename the keys? Keep them as written. The Lister writes exactly custom.language and friends, and Shopify matches on the key.
Something didn't import. Shopify's import email lists the row and reason. The usual ones: a definition missing (E3), or a price field left blank for a card you set to "offers only".
Stuck?The three things that go wrong
"Shopify rejected that token"
Usually the app wasn't installed on the store yet (Step 5), or the Client secret was copied with a space on the end. Go back to App settings, copy both again, and make sure Installs shows 1 on the Overview.
"That doesn't look like a token"
You've pasted something else into the first box. It wants the 32-character Client ID (or, if your Shopify still has Settings → Develop apps, an Admin API access token starting with shpat_). Not the secret, not the app URL.
Sent to Shopify, but they don't show in my store or POS
They were created without a sales channel. Your app is missing the two publications scopes. Follow Already made the app? above, then tick the channels on the ones already sent.
"Shopify hasn't allowed Card Club to create products yet"
The app has no write_products scope. Same fix: add it in a new version, release, Disconnect and reconnect in Card Club.
Pulled, but cards are missing
The pull only brings in active products with stock that are inside the collection or tag you chose. Draft products and sold-out products stay out. Pick "Everything in my store" to check, then narrow it back down.
Still stuck
Email hello@cardclub.com.au with your store address (the .myshopify.com one) and a screenshot of the message you're seeing. Never send the Client secret.
That's the lot.
One stock count, two shopfronts, and the marketplace reach you can't get on your own.